Banjo players know that mastering the left hand technique is essential for playing well. In this article, we’ll explore some of the basic left-hand techniques that are used when playing the banjo.
Check out these free Banjo tabs to get you going!

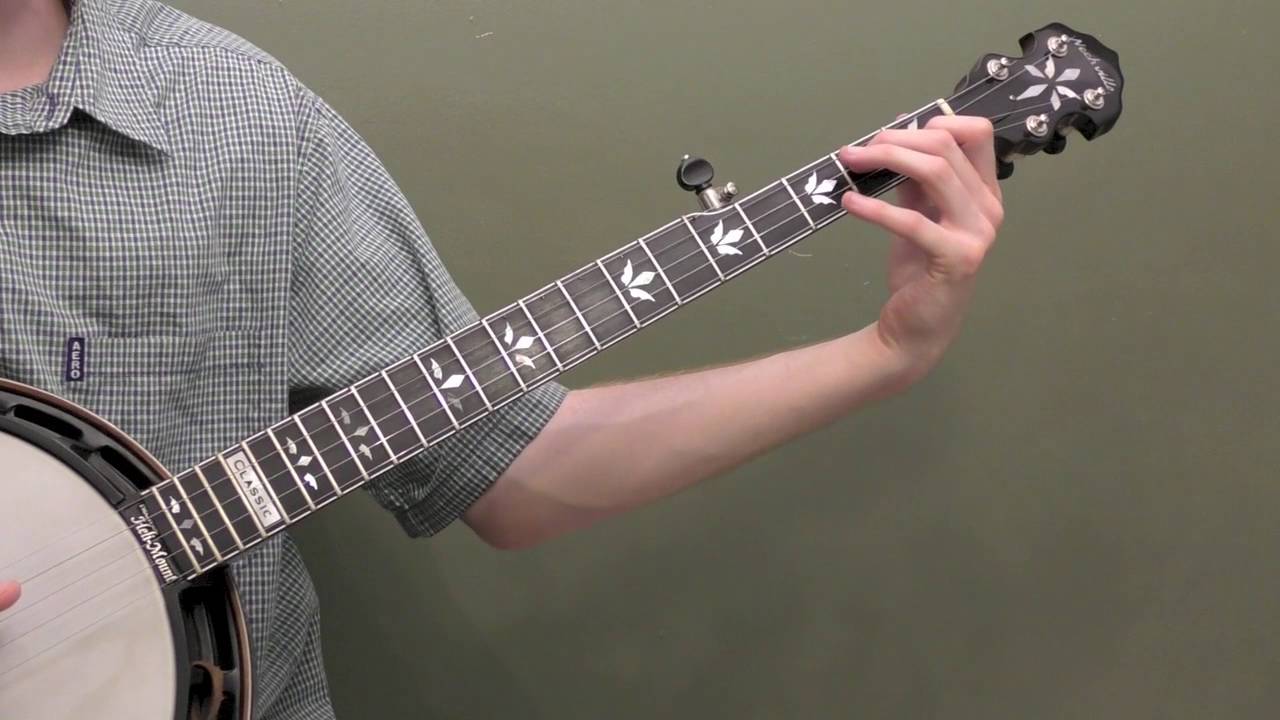
Basic Left Hand Technique For Banjo
The first technique to learn is called fretting. Fretting is the act of pressing down on the strings with your left hand to create different notes. To fret a note, you need to place your left-hand fingers on the string in the desired fret position. The frets are the metal strips that run along the neck of the banjo. The first fret is the one closest to the head of the banjo.
One of the most important aspects of fretting is finger placement. Proper finger placement ensures that you play the correct notes and that the notes are clear and in tune. When fretting, you should use the tips of your fingers to press down on the strings, just behind the fret. Make sure your fingers are curved and that you’re not pressing down too hard. With practice, you’ll develop the necessary finger strength and precision to play clear and accurate notes.
Another important left-hand technique is hammer-ons. A hammer-on is when you play a note by striking the string with your finger, then quickly pressing down on the string in the next fret position with another finger. This creates a smooth transition between two notes without the need to pluck the string again. Hammer-ons are commonly used in bluegrass banjo music and can add a lot of character and flair to your playing.
A related technique is the pull-off. A pull-off is the opposite of a hammer-on. It’s when you play a note with one finger, then pull your finger off the string quickly to create another note in a lower fret position. Like hammer-ons, pull-offs can create a seamless transition between notes and can add interest to your playing.
Slides are another left-hand technique that you’ll want to learn. A slide is when you play a note and then slide your finger up or down the string to the next fret position. Slides can create a smooth transition between notes and add a sense of movement to your playing. It’s important to use the correct finger placement when sliding to ensure that the notes are clear and in tune.
Finally, let’s discuss vibrato. Vibrato is a left-hand technique that creates a wavering effect on a sustained note. It’s achieved by rapidly bending and releasing the string with your finger. Vibrato is commonly used in classical and jazz music, but can also add a touch of sophistication to your bluegrass banjo playing.
In conclusion, these are just a few of the basic left-hand techniques used in playing the banjo. It’s important to practice each technique carefully and to master it before moving on to the next. With time and practice, you’ll develop the necessary skills to play with precision and character, and bring your banjo playing to the next level.
In this video from Mike Hedding we teach you everything you need to know about left hand technique for playing the banjo. Great for beginners. Practice your right hand technique here.
Video Text:
0:00:05.2 –>
alright hey there everyone in Banjo land, Mike Hedding here got another little mini banjo lesson for you I did a lesson a few weeks ago on my right hand technique and wearing your pics so I figured I better do a follow up and talk about the other hand your left hand so this this lesson is going to deal with kind of some of the basic beginner pitfalls I see with people with their left hand not using the proper wrist angle using flying fingers and I’m going to talk about some of the basic things and hopefully save you some future you know learning some bad habits that you’re gonna have to undo in the future I’ll always preface this in my videos by saying this is just what works for me so take all my techniques with a grain of salt and everyone’s hands and wrists are different so what works for me might not work for you but I would say give it a try and take it with a grain of salt and hopefully it’ll help you out so here’s my lesson on left-hand banjo technique alright let’s go over some basic left hand technique for the banjo this is
0:01:00.6 –>
some tips I’ve picked up over the years that helped me and I’ll preface this by saying that a lot of this stuff takes a while to work in your playing it’s not stuff that you’re necessarily gonna change overnight especially if you had some bad habits that you’ve already been working on and you’ve committed to memory and might take a little bit of time to unlearn some of that stuff I’ll also say that everyone’s left and right hands are different so this is just what works for me so take take it with a grain of salt and see if it helps your playing alright so first thing we want to do is we want to make sure we get our correct wrist angle this is one of the things I see beginners struggle with the most the wrist is either bent back way too much like this or bent way too far out like this and you want to find a happy medium in between those two if you’re bent back like this not only is it gonna everything tightens up right here and up in your shoulder when you bend your hand back like that but you’re also it’s gonna be really hard to play each string cleanly because you’re gonna
0:02:01. –>
be working against the your wrist basically to play notes vice versa if you’re out too far like this one it puts tension up here again and you want to be able to use the banjo and you actually want to squeeze a little bit with your left hand to help you push it on the notes and if you’re out too much like this you basically lose your ability to squeeze the notes so you have to find that happy medium in between the two where you’re not too much back like this and you’re not too far out one kind of test that I do is I put my hand where I think it feels comfortable and then I take the banjo away and if it looks like okay I could hold my hand like that you know then it’s probably okay whereas if my hands like that or something and it’s like ooh it doesn’t even look like I could hold my hand that long you know putting a banjo neck in front of it’s not gonna suddenly make it be really relaxed so that’s a good test is again take your hand away and if it feels like okay I could hold my hand like that then then put the banjo neck
0:03:02.3 –>
back in and see how how feels the other thing I recommend is having a little bit of space this might be hard to see from the video but I’ve got a little bit of space in between right here I’m not I’m not gripping really tightly right there I need a little bit of space there for one so I can move around the neck but also again so I can I can land on there notes ring out like here’s something you could try to start off is take let’s say let’s take our second finger because it’s our longest think especially this will work good especially if you’re just starting out let’s put it on the third fret of the second string and just we’re just gonna play all the other strings and we’re just trying to see how far that distance is so again we’re not muting that string and we’re not muting it the other way again if I’m back too much like this I’m gonna be muting that string that higher string and if I’m too far the other way then I’m gonna be muting the lower string so you have to
0:04:01.5 –>
find that right distance make it try with easier fingers try it on different strings try with your third finger try with your pinky yeah it doesn’t matter what frets you’re putting it on you just need you want all the notes to be able to ring out you know put them on all the Rings again you need to have that clearance you can do all of those to ring out that’s something that’s a really basic exercise you can try we meet all the notes to ring what string we’re playing on the other thing you could do is take take a basic chord like maybe a d7 would be really easy do the same thing I call it the stream test we’re basically just testing these straight to make sure they’re all ringing out and that takes a
0:05:00.3 –>
little bit of practice and just keep adjusting your hand again find that happy medium where you’re not bent too much back like this and you’re not out too far I’m also using my thumb a little bit to squeeze and again you can see my thumbs peeking up a little bit right here it’s not bent back too much behind the neck I can use that little bit of pressure to actually help squeeze those notes and I really want to keep keep my notes down as long as possible the banjo doesn’t have great sustain compared to other instruments so we need to keep our notes down to help sustain otherwise our notes are just gonna be too short so that’s probably one of the most important things left hand technique wise is getting the the optimum wrist angle because if your back too much like this one it’s just gonna be really tense and it’s gonna be really hard to play it’s also gonna be really hard to cleanly put down notes it’s also gonna be really hard once you start moving up and down the neck because
0:06:01.1 –>
you’re the back of your hands gonna be rubbing on the neck which is really gonna slow you down so I’m using my right hand and my body to secure the banjo or I’m using a strap so again really important I’m not using my left hand at all the hold the banjo which is a really common beginner mistake you get a little bit more you know you feel like you get more control and you’re holding the neck initially but long term it’s gonna slow you way down okay a couple other little beginner mistakes I see all the time is the flying fingers okay so the farther you bring your finger up the Frog you’re gonna have to go back down so it’s very common and sometimes people don’t even realize they’re doing it it’s after you put down a note your finger pops way up and I’m kind of exaggerating it obviously to show you I call it the flying fingers you know where your hand does then and you’re popping way up and notice how much further I have to go
0:07:01.3 –>
down so the further I go up the further I have to come back down it also increases the chances that I’m gonna miss the note what I recommend is practice lifting your fingers up barely at all and that takes a lot of practice holy work it into your routine you know you can really you barely have to lift your iron off at all to get the note to read out cleanly and then I’m right there to go right back down to that notes so really important doesn’t matter if I’m doing it even between two different fingers same same logic here so I got to keep my first finger down when I hand my second finger so another really important left hand technique thing is not lifting that finger up like that see how I’m doing that like if I do it two three hammer on I’m not lifting my first finger up I’m keeping my first finger down not only is that if I don’t perfectly execute that hammer out I
0:08:01.9 –>
still got a note but also it allows me to go right back to that note let’s say I do a hammer-on pull-off like that whereas if I go you can lift them both up then I’m just creating a lot more work for myself so really important here’s a little exercise you can practice is it won’t sound very musical but it’s really good left hand practice so just do one finger for each string or one finger for each fret excuse me so and then go backwards it’s not very musical sounding but you’re just practicing it’s really gonna help your
0:09:01.9 –>
sustain and again it it takes work to develop that practice habit but once you get it down you have so much less work for yourself because you’re not lifting up fingers that you don’t need to that’s probably one of the biggest things I see beginners do is that they just create so much more work for themselves because they immediately lift all their fingers up and then many times you’re having to put it back down on the same exact note you just lifted it up imagine I was just going like this all the time you know lifting my hand up and down and putting it on the same note so you know when people talk about speed when they talk about the flow of the song those are huge things that really make a huge difference again if you’re creating all this work for yourself by lifting it and putting your fingers back on the same notes it’s gonna be that much harder to go faster and that much harder to stay relaxed okay so those are a couple really important things I noticed with beginners I’m left hand technique is one that the flying fingers and two is the
0:10:00.2 –>
wrist angle and three is keeping your fingers down you can do that all over the neck you know part of left hand technique is just developing some strength so that takes a lot of practice Peschel ii like with your pinky last thing I’ll say about left hand technique is you need all your notes to kind of go straight down by straight down I mean this way not you can’t be bent back like that you need your fingers to go straight down on the notes the other thing I recommend too is I kind of and this is just what works for me but I kind of think of the angle of my of my hand is almost coming back almost towards my face whereas I’m not my hands not pointing straight up you know I’m not putting down the notes like that because that really twists my hand in an awkward position so I’m actually again kind of playing to the side again if you follow the angle in my hand it’s coming almost back towards my face and I’m keeping that cuz
0:11:04.7 –>
again once I have a when I put down a higher note whatever I’m doing back here is is canceled out so you can lean on the string a little bit you don’t have to be completely straight up I’d avoid going straight up this way because again at least for me it just it makes me have to crank my hand in a weird position so I’m always kind of thinking of the the angle my hand is coming back toward my face like especially when I think like a C chord like that or a decent I’m going I’m thinking of it it’s kind of coming back that way and that’s what works for me so try it out with your chords yeah you can Frank just keeping your notes down between your changes that’s good really gonna help the flow if I lift everything off then the sound breaks and then I have to get my next chord so keep your left hand down same thing if you’re moving around the neck you know you use your thumb as kind of the guy that’s the other that’s kind of
0:12:00.3 –>
my leg left hand techniques is use your thumb and it’s kind of keeping it always almost in line with my first finger like that so today I go up there so I’m kind of using my thumb almost like guide and then I snapped back down to home base where my thumb kind of sits and that’s really important for when you go up the neck and then you need to snap back down quickly okay so that’s some basic left hand technique stuff again keep your fingers as close to the frets as possible go straight down on the notes and always do kind of a string set especially when you’re first starting out that’s a really good way to tell again if you’re hitting one of the notes and it’s not sounding right you need to adjust your hand alright so hopefully that gives you some tips all right good luck you.
More Banjo Articles
Banjo Picking for Beginners
Basic Right Hand Technique for Clawhammer Banjo
How to Wear Your Banjo Picks
Learn Basic Banjo Chords
Learn to Banjo Roll
Bluegrass Banjo Right Hand Technique
How To Tune Your Banjo